i got sick of dualbooting windows

taking into consideration this, i decided to pull out my old rx 570 and put it back into my computer to make myself a virtual machine with my current graphics card passed through into it. so far it’s been a good experience so why not talk about it here.

after putting the computer back together i started it up and noticed that for some reason the bios screen is all white on the card i’m using for linux. weird, but waiting a few seconds results in linux booting normally (apart from what seemed to be a stack trace appearing that i fixed later on) so i take no notice. once the computer booted i had a look for guides and came across this guide from github user bryansteiner which covers installing the necessary software, setting up hooks to automatically pass through any devices you’d want to use and add them back to your host once you’re done with the vm, making the vm itself, and some performance enhancements. i followed this and not long after saw the tianocore boot logo on the display i plugged into the vm’s gpu. after installing windows i noticed that the graphics card claimed to have failed to properly start, with the error code 43 showing up in device manager. i turn the vm off to troubleshoot and end up learning something fun about radeon graphics cards.

turns out there exists a known, years old, still unfixed bug named the AMD/Radeon Reset Bug where from what i understand, after powering off or restarting a VM the card is put in a state where its unable to come back up until you reboot your host. and to make things even better if you try to reboot your host in this state it’ll hang and you’ll have to force it off. this naturally diverted my attention a bit and led me to try out this fork of a kernel module named vendor-reset which claims to be able to fix this bug for the family of graphics cards mine belongs to. unfortunately it didn’t seem to function on my setup so after re-evaluating whether or not i *really* needed the gpu to be accessible on my host i decided that it would have been more of a nice-to-have than something that would stop me from doing anything i’d want to do on the host so i ended up just giving vfio-pci full access to the card later on.

but until that happened i was still in hell and still wanted to find the solution to why windows didn’t want to start my graphics card. after some searching i found posts online that claimed that having Resizable BAR enabled in your BIOS can cause this issue. i disable it however and my computer was unable to start the display manager (or looking back at it maybe it was attempting to start it on the other GPU as at this point i hadn’t actually given vfio-pci the card, that’d come later). since it clearly wanted me to re-enable ReBAR i did and came across this page which contained the information i needed to sort this out.

so to explain what the bloody hell’s going on i’ll attach this picture here:

you don’t really need to know what any of this output means (i don’t even know myself really right now lol, my last motherboard was for a 13 year old processor. said processor is also currently where my computer gets its hostname, hence why its set to what it is. the haswell i7 unfortunately did not have ReBAR support), but i would like to bring your attention to the bottom line of that output, BAR 2. by default, my machine under Linux sets BAR 2 to its maximum supported size of 256MB. turns out windows doesn’t like that. it can’t handle that being set to anything above 8MB. so i temporarily change the BAR 2 size and boot the VM up, which did indeed fix that issue.

now that i’m able to see graphics at a resolution that exists i thought i might as well fix the reset bug so that i don’t have to reboot my host every time i reboot the vm. as discussed earlier my fix for it personally was to just give vfio-pci access to the card all of the time. so while figuring out how that all worked i came across this repo from github user clayfreeman which also goes in-depth on how to make a virtual machine with a gpu passed through into it. i used all the steps in the “Blacklisting the GPU” part to do exactly as the name suggests. after rebooting i noticed that the stack trace i went on about earlier disappeared, then with my newfound knowledge decided to blacklist the M.2 NVMe SSD i’m using as a boot drive for the VM so that i never have to see it again on my linux machine. doing that meant that i had to get rid of the scripts in the libvirt hooks folder for binding the GPU to vfio-pci and back to amdgpu once i’m done with the VM so while doing that i set up a script that unbinds the card from vfio-pci so it can resize the BAR, resizes BAR 2, then rebinds it to vfio-pci before starting the VM so i don’t have to do it manually every time i reboot the host.

with the vm now functioning i decide to go through the setup for Looking Glass which was a fairly easy experience. compiled a lot easier than a lot of other softwares i’ve had to compile to use in the past. upon trying to actually use it though i just got a black screen on the viewer which i fixed by making the realisation that i compiled the latest version on the host and on the VM downloaded an older release candidate build. updating the VM’s software fixed that issue.

now for the question of kernel-level/invasive anti cheat softwares. my answer personally is to not even bother with evading their detections. i’m lucky in the sense that the only thing i actively use that’s “protected” by these kinds of malwares is VRChat. when they initially announced they were going to use easy anti-cheat in their software the platforms that people moved over to in protest were ChilloutVR and what was called Neos VR at the time, now known as Resonite. i picked Chillout mostly due to it’s familiarity coming from VRChat compared to Neos. i wouldn’t mind using this as a chance to go back. in fact i’ve already ported my avatar to Chillout and it works great.

speaking of anticheat i thought i’d discuss Roblox’s VM detection for a quick second, part because i use the platform a lot to play Dandy’s World (good game if you make the choice of not interacting with the developers’ Discord server, use a randomiser once you’ve got basically all the Toons and in my experience it makes the game really fun) and part because people are very very split online as to whether it works on a VM or not. i can add one to the list of people who have had success in running Roblox in a VM:

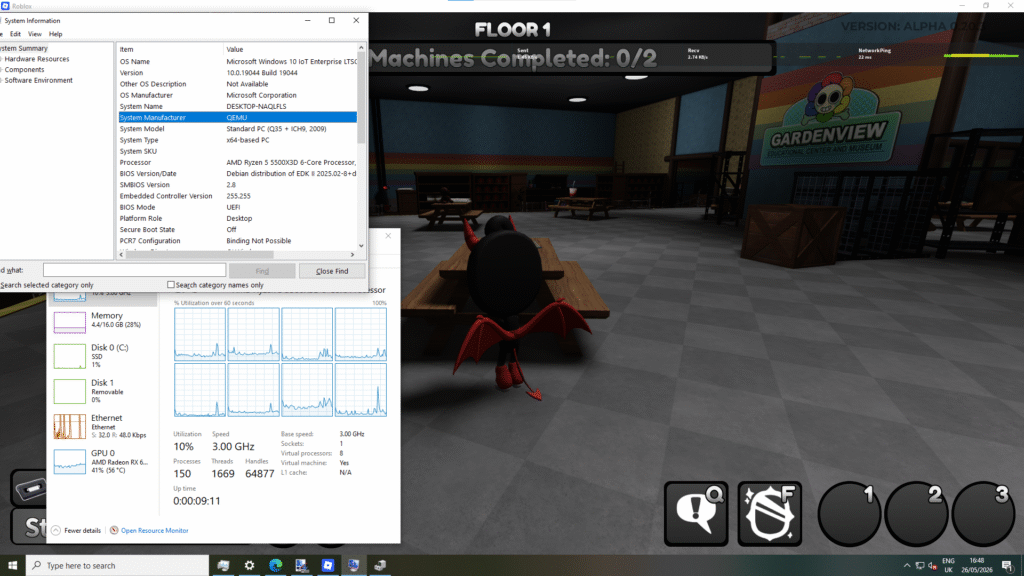
some things i would like to state though are that you do need a GPU passed through into it, it will error out if you don’t give it one, and i currently don’t understand why but now know from experience that for Roblox to run on a VM whose host runs an AMD CPU you also need to make sure to pass the ‘topoext’ feature which allows the VM to be aware of the fact that you have a processor capable of hyper-threading.

probably good practice to enable it either way though considering what it does.

edits

(2026-05-31: “it will error out if you don’t” is now “it will error out if you don’t give it one”)
(2026-05-31: replaced the phrase “QEMU hooks.d” with “libvirt hooks”)
(2026-05-31: updated images to enable enlarge on click)

the downtime

so the server was down for a little while as a result of some “maintenance” so i thought i’d write here about what actually happened during the downtime.

first, i had a look online for some storage. excluding the boot drive, the server’s been living off of a 4tb seagate barracuda that was unable to access its last ~600gb of data as fast as it could the rest of it this whole time. i thought it was time for an upgrade because i was indeed rapidly approaching that last 600gb and i wanted to be able to continue downloading youtube so i don’t have to use youtube anymore. i found a listing for some 4TB SAS drives at around £31 per drive which i feel is fairly good considering the rapidly increasing price of literally everything. next i went looking for a SAS HBA card because the microserver gen8’s built-in drive controller doesn’t support SAS drives. that led me to an LSI 9211-8i that i got for ~£33. when they arrived i cable tied a small fan to the card’s heatsink as people claimed the cards run hot and after fighting with the iLO and USB ports then giving up and flashing a livecd onto a spare SSD, i had it booted to be able to flash the card to the latest firmware that the gen8 supports. the flashing was a surprisingly easy process, backing up the current firmware went quick and putting the new firmware on was equally as quick.

next i put the drives in and booted the machine. once in i chose to set the drives up as a raid 5 array with an ext4 filesystem as i figured 12tb would be plenty for now and some extra redundancy wouldn’t hurt. now why i didn’t choose something like zfs is mostly just because of my inexperience with it and that raid and ext4 has worked perfectly fine for me in the past and still continues to so i suppose i’ve just not felt the need for anything new in that regard. after that was set up copying the existing data took around a night, i had the old hard drive plugged into my main computer to transfer the files over the network. once i woke up the downloading began. i set up tmux and yt-dlp then went mad downloading youtube channels. clearly too mad because once i had got out of vrchat that night i SSHed into the VM doing the downloading and i had been banned from accessing youtube on my home IP lol. an install of the mullvad vpn client fixed that quite quickly though and within like a minute i was back to downloading.

a few days prior to this i had been offered another microserver gen8 from a friend. at this point it had turned up and i decided to link the two together in proxmox, give the other one a cheap graphics card for transcoding and pass the server VMs to that machine, and so onto ebay i went. i found an nvidia quadro p400 for cheap and bought it. once the most powerful nvidia card i’ve personally ever bought turned up i put it into the server and booted it but once it got past the first stage of boot the display on the iLO console went black. this was because the bios was set to output its display to a discrete gpu if one was detected which is actually really reasonable. the unfortunate part about that however is that i am not reasonable. into the bios i went to disable that! once the server started i edited the boot parameters to allow pcie passthrough and then passed the GPU into the VM running the jellyfin server. installation of the drivers went smoothly and now the server doesn’t take minutes trying to transcode my breaking bad rips using software.

we should be back for good now.

a slightly early 2 years

i’ve managed to write at least one post for this site every month for 2 years, which i feel is impressive for my standards since my interest in things usually goes after about a month only to reappear months later for a similar amount of time. in a small celebration of this i’ll let you all know about some things i’m working on in the background as i did last year.

first is a post about the recent downtime the server experienced. what caused that was that i was performing some upgrades to it and said upgrades took a lot longer than i expected which despite that i simultaneously expect for these kinds of things. it’s all working great now though and the server is a lot more capable than it was. i’ll hopefully be talking more about the specifics of it some time soon.

next is something i do recall talking about in the past which is that i wish to start making write-ups on every vr headset i own. right now my collection is quite small at only two (a third turning up tomorrow) but as time goes on i’m sure that number will increase so long as my interest in vr stays which i’m pretty confident it will. said write-ups will contain the expected info like the headset’s resolution, fov, tracking quality, and comfort. in addition to that i’ll also be talking about the modifications you can do to get a bit more out of them as well as an analysis of how well the headsets run popular vr software/games on an older machine i’ll build out of my last computer once i’m done upgrading the one i’m typing this on, which i understand will likely exclude newer high res headsets but i don’t plan on focusing on those myself due to their generally high price and my interest being more towards getting the most out of older stuff as i’m sure is evident from what i talk about here. and as promised at some point i’ll get to testing steamvr performance with the 2.0 ui vs the 1.0 ui as i’m still using the old ui due to its better performance on my machine.

see you all next month.

the one for this month

what comes to my mind when i think about this month is mostly soldering and console repair so i thought since i haven’t said too much about that outside of the gamecube, dreamcast and the 3 original xboxes i’d talk about that for this month.

after doing the xboxes i naturally thought the next step would be the 360 despite the added difficulty of some very small soldering points and on the 360 S systems (my personal favourite model) having to scrape some solder mask off a via to expose a point. at first i had a look on ebay and found one with a trinity board for cheap that had a burn mark on the front panel. i thought i’d do that one cause as i’d go on to say to a friend i borderline felt sorry for the xbox but the day after i bought it i got refunded with the reason being that it was out of stock or damaged. that led me onto cash converters who were having a flash sale on another trinity that i bought instead.

i then had to have a look online for the things i’d need to try and pull off this rgh. finding smd LEDs and a craft knife etc. was easy and rather boring so we’ll skip past that and then i found a local site selling 360ace v3 chips for a really cheap price with a high quantity in stock (500+) which surprised me because apparently the xilinx xc2c128 CPLD that powers the chip is no longer being manufactured and because of that we’d run out of them at some point. i suppose they were talking about a lot further into the future than i thought this would actually occur at given the current state of the economy lol.

anyway i feel it’d be valid to ask something along the lines of “360ace? rgh1.2? why are you doing that? doesn’t the rgh3 exist?” to which my answer is that i wanted to install a viper dual nand v2 to switch between stock and rgh on the system. installing one with one of the nands flashed to the stock image on an rgh3 from what i understand would cause that stock image to red ring when you try to boot into it as the stock software doesn’t like having an rgh in place and the viper is unable to disable it like it can with the chip because what’s doing the glitching on rgh3 is the 360 itself (specifically the smc which is part of the southbridge). now why i wanted to do this when stealth servers exist is that i personally don’t trust the majority of them. (i won’t name any except for my mention of proto later on because i feel proto is cool despite these beliefs of mine, nor will i provide any proof as that’ll cause services to be named but i’ve seen) paid ones using dodgy payment gateways that have horrible ratings online, the abundance of stealth servers that provide you with easy to access cheat menus, the fact that none of them are open source especially, and not to mention petty drama between services that i believe is completely unnecessary and in my mind only serves to make me think that the operators of one of these services caught in the conflict are just one day gonna take everyone’s keyvaults and fuck off. similar things have happened before in other homebrew scenes (see this vice.com article, ctrl+f and search for “DAuther”). keeping the software closed source would make total sense if it were 2011. you have a piece of software that allows you to bypass a load of challenges that the microsoft servers will give to your system to determine if it’s modded or not. of course you wouldn’t want to make that open, they’d patch it immediately. but it’s not 2011 anymore, that was 15 years ago as of the time of writing this and it’s clear as day microsoft do not give a fuck about the 360 servers anymore. a bug in the cloud save system for 360 games has just been fixed after at least a month of game data showing up as corrupt for some users, they do not care anymore and i’m sure that if something like the completely free proto stealth server were to go open source the tricks it uses to present your system as stock to microsoft would not be patched at all.

now that i’m done ranting though let’s get to the install. i try to open the system up and manage to do it after the xbox managed to slice 2 of my fingers. i sort my fingers out, clean it up a little, get the board out, take the heatsink off with an x-clamp removal tool, and flip it over. the first thing i do is scrape the solder mask over the pll_bypass via because i figured that if i fucked that up everything else would be for nothing anyway. after maybe 10-15 minutes and this mrmario2011 tutorial i somehow have the solder mask scraped. copper’s all nice and exposed and i didn’t accidentally cut the trace below the pll point (which for those of you who don’t know would make the system unbootable until you repair it). i then solder my nand programmer to the board (god the yellow point is so fun to work with), power the board and connect the programmer to my computer to dump the nand then flash xell. after that i solder a wire to my now exposed pll point then solder a wire to everywhere else, the post and reset points at the bottom, the clk point next to the hana, and 5v and ground. that goes onto the glitch chip that i prepared by soldering a pin header to the programming points, flashing a timing file, then mounting it in the space just in front of the heatsink. i start the system and holy fuck i actually did it. i’m in xell. after that i take the cpu key and use that to make myself a 17559 glitch2 image with smc+ and the nohdmiwait patch applied. that gets flashed to the system and yeah it boots great.

next it’s time for the viper dual nand. i flip the console over, position the qsb, tape it into place temporarily and get to work. soldering those points is something that i honestly found really fun and once it was done i soldered in the 4 extra points and set the jumper on the dual nand. next is the rf board. i take the plastic led diffuser off the board and scrape a space near the light that corresponds to the third player when the system is stood up to solder the negative point of an smd led that’ll be used by the viper to tell me what nand it’s on when i tell it to switch. positive goes to an unused point on the connector that you can use for this led and after that i just take some time to be genuinely surprised at the fact i managed to do any of this. after resoldering the yellow wire from the nand programmer (we love you yellow point) and flashing the stock image back onto the stock nand and the rgh image onto the dual nand chip, it all worked great.

…or so it seemed to. later on in the day, once i was back in my bedroom and the xbox was put back together, i was configuring dashlaunch. i accidentally reinstall dashlaunch thinking for some reason it wasn’t preinstalled on the system before actually having a config it could use and even after noticing the install button’s current description said that pressing it would uninstall dashlaunch. reinstalling it for no reason seemed to go well so i rebooted and the system wouldn’t glitch. i assume i must have bricked it then and leave it be, planning to flash it again tomorrow. a few hours later i turn it back on just to see what would happen and it actually glitches fine again. i then start to set up xbdm so i could replace the bootanim.xbe file stored in the nand with the old 360 boot animation and after rebooting it wouldn’t glitch again. this leads me to believe the timing i flashed wasn’t as consistent as i first thought it was which ends up being correct. after flashing the right timing file for that system it works great. most of the month later after plenty of use it still works great. i’m happy to be able to say i own an RGHed 360 now because i remember absolutely ages ago trying to load xexmenu on my old stock 360 E thinking it’d just work lol, now i actually get to see it work. even more happy that i actually managed to do it myself really.

edits

(2026-03-01: i realised i didn’t explain the purpose of the smd led so i’ve added a sentence to do that)

santa’s little xbox

so that xbox from yesterday. yeah i seemed to be right about it not really being fucked as much as it was trying to boot from a source that had nothing to give it. i opened it back up today and one of the wires were magically disconnected from the LPC. so i took all those wires out and done a better job soldering it and who would have guessed, it boots now. since the issue with that one originally was the hard drive, i used the chip to lock the drive in there to that xbox’s key and it loaded the microsoft dashboard once i told the chip to just boot from the tsop. a fairly old dashboard it would seem, one without the xbox live option. i suppose expected since it is a 1.0. at first i thought there would be nothing on the drive and then i took a look at the savegames and noticed an xbmc save. that convinced me to boot it back up into the modchip’s menu to get an FTP server going so i done that and connected to it and did notice the old owner’s xbmc, avalaunch and unleashx installs among trainers and a dvd player software and a few other utilities. i then FTPed over the xcat launcher and cerbios, booted into cerbios to then open xcat and that found just under 2100 files of interest and uploaded 434 of them. i do wonder what happened to that xbox in its past life.

how has 2025 (almost) ended already

this month i’ve spent learning how to solder shit finally. so far it’s been an enjoyable process and i haven’t irreversibly broken any of my consoles (i say, sitting next to an original xbox that i’ve given the “christmas lights” frag error to, we’ll fix that soon i’m sure…) so why don’t i let you lot know what i’ve worked on so far.

first thing i done (after practicing of course) was my dreamcast. it just needed a replacement clock battery. soon i might do the resettable fuse mod but i’m not too concerned about that. it was easy enough to take out the old ML2032 and replace it with a vertical coin cell holder. clipping off the leg of the resistor next to it and soldering in the diode went well too. i popped in the new CR2032 and this is where the fun starts. so i plug it in, turn it on, and nothing happens at all. after loads of troubleshooting i give up and assume i’ve somehow broken my dreamcast while attempting to replace the clock battery. hours later i make a realisation though and go back to my work area to get the cable i was using to try and power the dreamcast. once i see the plug my realisation is confirmed. my smart ass used a cable that had no fuse in the plug. i put one in and who would have guessed that the dreamcast works fine now that i’m using a plug with a fuse in it. i take it upstairs and it does indeed remember the time now.

next was my gamecube. i take that apart, replace the power led with a green one, install a coin cell holder in place of its clock battery and tear it down to the motherboard to solder in a pi pico for picoboot. as the guide states it is one of the easier soldering jobs you can take on but it is still one that takes time, as soldering does indeed tend to do. it’s nice to have some form of magnifier to help line up and solder in the cables to the board too i found. once everything was soldered in and i was sure that it all looked good i put it back together and turned it on. this time it actually came on but it booted to the gamecube’s ipl for some reason and not gekkoboot (which would then load the first ipl.dol it sees, in my case swiss). i try flashing the pi pico again (fun tip, don’t do this with the pico’s power still connected to the gamecube. it will try to power whatever the pico’s soldered into and it was very weird seeing my gamecube to hdmi adapter’s power light coming on when i plugged the pico into the computer. it didn’t harm anything in my case but still it’s best to be on the safe side with these things as i understand it.) and that doesn’t change anything. and then i realise i’ve forgotten about their golden rule for the wire length. they can’t be any more than 10-12 cm long. the way i was trying to mount the pico meant that the wires were way over that so after referencing this video from macho nacho on the topic i mount the pico somewhere reasonable and the gamecube does indeed boot into swiss. a few days later once the parts arrive i bring the gamecube back in to install a set of green leds to the controller ports. i set up each led by clipping the leads, attaching a resistor to the positive end of each lead, adding wires to each lead, then using heatshrink on anything that needed it. i was having trouble putting the top shell back on and at that point i reference this video from MVG to realise that i put on way too much heatshrink. so i manage to get off the excess and hot glue the leds in place like he does in the video and now my gamecube looks very green and i love it.

now the xbox. and by the xbox i mean the xboxes. i bought three of them in various condition for not that much more than the price of one working one (around £70). so far i’ve removed the clock capacitors on each board and today i brought in the most fucked of the three (a what seems to be 1.0 that’s absolutely had someone in it and displays many a hard drive error on bootup) in hopes of installing a pi pico in there to use as a modxo chip. i took my time installing each wire to the points on the LPC and D0 and then didn’t take as much time installing the wires to the pico, something i regret but not necessarily because i think i’ve broken the xbox (since i right now don’t think that’s the case), more because i realise that if i want to keep doing this i really should learn how to manage time and stress better. anyway i put it back together and as stated in the first paragraph it’s now showing me that it can make christmas lights. from researching what that error is i believe what’s happening is that D0 is being sent to ground which is telling it to look for a bios off the LPC bus but it’s not able to get any bios image off the pico when searching for one there and so it gives that error. if that golden rule from installing the picoboot is just a general rule of thumb/it’s just a good idea to keep cables as short as possible then it may just be that we’re looking at another case of cable too long. i shall keep you updated.

merry late christmas to those who celebrate and happy new year :D

just buy a steam deck

that is not purchasing advice. it is a thing i’ve done however. so for context i was looking for a handheld, one considerably more capable than a switch, now that x86/64 handhelds exist it would be nice if said handheld was one of those since the vast majority of my games are built to run on that architecture, preferably not windows though, and preferably not as thick as a brick. i didn’t need one that was too powerful, just good enough to run what i want to run at actually playable framerates, i wasn’t looking for an amazing oled high refresh rate screen because i’m perfectly fine with using 60hz lcd displays outside of vr, and having a low amount of storage would be fine cause x86/64 machines tend to be fairly known for their upgradability. i did look at other handhelds before deciding on the deck but between their high price, high amounts of power and high spec screens that just don’t make sense for my use case, and as said earlier the thickness that they tend to have (and the weight that tends to come with it) that base model one sounds good to me.

so it arrived fairly quickly after a delivery guy turned up claiming to be from the courier that was delivering it only for them to disappear and for another dude who actually was from said courier to turn up. thinking that was an absolutely outstanding experience, i get it off the dude who actually had it and plugged it in to get it out of the battery storage mode it gets shipped to you in. i turn it on, let it update and log into my steam account, and then go into the desktop mode and use it to flash a bazzite image to a usb that i then installed over steamos.

my reasoning for using bazzite as opposed to steamos for the most part are just a few smaller things that for me add up. bazzite supports hard drive encryption, so by using my phone as a usb keyboard emulator i can keep it encrypted using a very long and very secure password which makes sense to me since it is a portable device that often sees reports of it being stolen. it won’t stop anyone from just overwriting the drive with another os of course but it will stop them from accessing my data and that’s what i’m worried most about. they claim to ship the newest software available, unlike their claim that steamos only sees bi-annually updates to system packages. they allow you the choice between kde and gnome which i like because i feel gnome works better on portable devices. you could certainly argue that steamos isn’t really the os for me. it certainly isn’t targeted towards people like me and that’s a good thing.

now, the hardware itself. plenty of people now have made the comparison between it and the wii u gamepad and since i have my 5th wii u on the way i thought i’d also mention the similarities between it and the wii u gamepad. the sticks being at the top of the system feels as nice as it does on the gamepad (although i must admit i don’t use them much, i’ll talk about that in a second), it feels as good in the hand as the gamepad does too. naturally it’s a bit heavier than the gamepad but it’s not uncomfortably heavy, whenever i need to hold the device in one hand for a second to grab a drink or something i’m perfectly able to. the trackpads are amazing. absolutely fucking amazing. they’ve completely replaced the sticks for me and i can’t wait for the new steam controller to come out because of them. they’re incredibly customisable just like the rest of the device’s controls, a lot more comfortable to me than a stick is because it’s naturally a lot closer to being flush with the case, and they can make navigating the os so much nicer than if they weren’t there in certain cases like using a mouse in desktop mode or text entry with the on screen keyboard.

performance? pretty good. at least for what i do with it. mostly a lot of indie and older games, really quite easy to run stuff. the resolution of the screen (that being 1280×800) i’m sure helps with performance too while at least to my eyes still looking really good. the very little amount of emulation i’ve done on the device seems to be really smooth too, gta 3 on pcsx2 runs stable at the 50 fps it should be at for the pal release of the game. it’s certainly not the best at running modern intensive games but if you’re like me and only do lighter stuff it’s great for that.

having access to a desktop mode i’ve found is a really helpful thing too since it allows you to run just about anything the average gaming machine running linux can. desktop software can be added to the big picture mode and steam does let you run multiple pieces of software in big picture at the same time so you’re able to do things like listen to music or a video while playing. in general the freedom of both the hardware and the software i feel is a big thing. it’s been talked about a lot but that’s because it really does matter. you’re free to install mods on your games, you’re free to upgrade the storage or swap the battery on the thing yourself, if the screen breaks you can take it as an opportunity to install a shell swap if you’ve been wanting something that looks a bit more colourful. if you didn’t buy a model with the anti-glare screen and you want that screen you can just buy one off the same people valve get them off through ifixit and install it yourself. if you don’t like linux you can install windows. if you have a death wish you can get macos running on the thing. if you like linux too much you can put gentoo on it. and that level of freedom is something that a lot of handheld devices have been missing, and something that shouldn’t be missing really since we paid for the things we’re holding.

boo

this month in my life is much like the past couple have been. not really a big thing to report on but a few smaller things that i’ve been doing.

first is the vr page. for the most part the page states its purpose but to explain it in here it’s preparation for some very future things i want to do on this site. i wish to host pages on this site filled with information i’ve collected over my time in vr because i quite like having free and easy access to information. the first page to go up will likely be one i’ve drafted about the lighthouse. at this moment in time it includes information about the 4 different retail revisions of the device that i am aware of and ways to access its built in serial console. i’m hoping the page will go up soon but really who knows lol.

next is my search for an ipod. i wanted one. part because of dankpods, part because embedded devices interest me a lot, part because rockbox interests me a lot, part because i’ve started buying music off of itunes due to its low price and drm-free downloads. it was easy to find one but god are the prices kinda mad. while looking for one i came across these two guides that really helped me understand what each ipod could do, what to look out for when buying one and where to get replacement parts for them. after researching for a while, i decided on a 30GB ipod video (5th gen) i found for ~£60. it was a bit beat up and had a broken screen and in classic ebay fashion now that i have it i’ve found a much better deal than the one i actually went with but i didn’t mind because in the future i plan to flash mod it and swap the shell anyway so paying a little more for a new screen wasn’t too much an issue. naturally with itunes installed on my computer, setup was really easy. i plugged it in, itunes asked to install a system service, it reboots, it lets me sync my music. what surprised me the most was how easy it was to install rockbox. just run the utility, add a theme in if you want, press install and reboot the ipod. i wasn’t aware it was that simple.

while looking for a dock for the ipod, i came across the sony tdm-ip10. it looked quite nice to me but one thing that i noticed while looking at pictures on an ebay listing for it is that it uses this weird proprietary port that kinda looks like the 30-pin dock connector that i’ve never seen in my life. of course with it being a completely proprietary thing i’ve never heard of i immediately gained an interest in it. turns out the port is called digital media port/dmport. according to wikipedia sony started using it in 2007 as a way to add extra functionality to their a/v equipment through selling devices like docks and wireless or bluetooth receivers that supported the interface. that got me interested in a device that supported it. i had the idea of getting like a stereo in the back of my head either way so why not have a look i suppose. a system that came up a lot when searching for dmport compatible a/v equipment was the cmt/hcd-hx80r “micro hi-fi component system”. it supports cd, all different kinds of radio, the dmport of course, aux in and usb as ways to play audio from it. (and now while writing this post i’ve been made aware of a version of it called the hx90btr that includes bluetooth support. good thing i don’t need that.) sounded good to me and you can find them all over the place where i am for really decent seeming prices, so i bought one for ~£60 and the tdm-ip10 for ~£14. it all arrived not long after and i’m really happy myself with the way that it works and the fact that the dock works fine in rockbox too, which i heard can sometimes be an issue with ipods running rockbox. i’ll have a bit of a deeper talk about it in the future i feel.

thanks for reading, happy halloween if you celebrate it lol :D

edits

(2025-11-01: made the text at the bottom of the page smaller, figured out how i done that last year again finally lol)
(2025-11-01: formatted edit text to follow the same style as the rest of the edited posts)

a macbook for cheap

so over the past few years i’ve had somewhat of an on and off interest in Macs due to this sort of exclusivity they’ve always had in my mind. i grew up using Windows and Linux which as i’m sure you’re all aware can run on a very vast number of machines, unlike macOS which is made to run on specific, usually very expensive, almost purpose-built machines (quite literally purpose-built now that Apple Silicon is a thing). as a result of their differences to the average computer, i’ve always wondered what it’s like to use one. and so every now and then i’ve been known to have a look on eBay at their prices when i’m looking at things i want to get. i remember in late 2023 for example, looking around for 2012 Mac Minis, specifically because they’re the last fully upgradable ones you can get.

well, a little closer to today a friend of mine was setting up a macOS VM on their home server and that gave me the thought “fuck it, let’s go hackintoshing again”. so after plenty of time messing about with OpenCore and an old ThinkPad with like a Haswell i3, 8gb of ram and a probably 5200rpm mechanical HDD, i had macOS 12 installed. i messed about a little bit but honestly gave up quite quickly on it due to the unsurprising slowness of the OS given the machine it had been installed on. weirdly enough though at first animations were really smooth on it. next i tried installing it on my main machine. this allowed me to install the latest version of macOS (15 at the time of this post) as it has an AMD GPU, as opposed to the now unsupported Intel integrated graphics the laptop had. this gave me a better experience. a considerably better experience. an experience so much better that i was considering getting a MacBook as a new laptop because either way i wanted a new one. my current laptop, a Lenovo Flex 2-15, while it has a touchscreen that i learned i really love, has a really bad keyboard and trackpad that results in me making frequent mistakes just trying to navigate the OS or type something simple and a battery that lasts about 30 minutes. (what is it with me and laptops that last 30 minutes on battery, my last one done the same thing too. it’s battery was so fucked that some Windows hardware info tools would report it as at like 300% once fully charged.)

as you should know by now if you’ve been here for any amount of time, “new” to me means “some decade-old thing, sometimes even older, that lost mainstream support ages ago that i’m willing to give mainstream support back to thanks to the use of some free and open-source tool i found on the internet”. so after some research, off to eBay i went! thanks to the information i found online, most notably these two videos from the YouTube creator “What’s on Your Screen?” (whose content i have now begun to watch religiously) i had a look for a mid 2015 MacBook Pro for reasons very obvious to anyone interested in Intel Macs and now very obvious to me. the 2.5 and 2.7GHz models could be configured with dedicated AMD graphics which should mean that future macOS releases will continue to run smooth whether officially supported or not, their trackpads are solid state, meaning they don’t move at all when you press down on them which allows for them to generally feel and work a lot nicer while being a lot less prone to damage, and their keyboards aren’t affected by the decrease in quality MacBook keyboards had starting in 2016 up till the release of the M1 Macs.

and turns out that now seemed to be a pretty good time to go looking for one of these things too. not long into my search i found one being sold with everything it originally came with, including the box, and with a replacement iFixit battery that had ~40 cycles on it for around £100. the only other example i could find at the time of one similar to that was around £360, so obviously there was a couple of catches to this. first, the left speaker was advertised as sounding distorted. no problem for me, i don’t really use the speakers on my laptops anyway. second, the machine took several hours of charging according to the seller to power on. again not an issue, just sounds like the battery needed some time after being left alone for a while. third, in the seller’s words charging can be a bit temperamental. that’s something i’m willing to put up with. fourth, while charging the seller noticed a faint crackling sound near the charging port. that’s fucking weird. the laptop’s mine now.

upon receiving it, i reset the NVRAM and booted the system into Internet Recovery mode to reinstall the latest version of macOS the machine officially supports (which is 12). once that was done i installed the OpenCore Legacy Patcher and had a look through the 3 currently supported macOS versions (13, 14 and 15 at the time of this post) to see which ones would run best on the machine. what i found was that 13 and 14 run great while 15 is a little slow at times. looking back at it though i assume it would have ran as fine as 13 and 14 did if i just gave it some more time. 14 needed some time and a reboot too before it ran as well as it does now. i also tried Windows and Linux as i did want to dualboot with Linux at first and as for Windows i just felt like it really, part to see what it’s like and part for the age-old joke of running Windows on a Mac. Windows installed on the machine considerably quicker than on any of my PCs and worked just fine honestly, apart from the machine running weirdly hot. Linux however was a bit funny for me. i tried Debian and Mint, both with Cinnamon and KDE. Cinnamon had issues with fractional scaling which made the machine’s graphics lag up at random points. i kinda expected it considering the fact that the fractional scaling toggle in Cinnamon does say its an experimental feature. as for KDE two thirds of the screen would just be white for some reason when i first booted. i later found out adding the kernel parameter “intel_iommu=igfx_off” fixed this issue and allowed me to load into it a little more correctly. once in fractional scaling worked fine but in some software (most notably the terminal) there would be tiny little lines of white pixels at the bottom of their windows. i was unable to find a fix for this and due to that i just decided to keep only macOS 14 on the machine for now.

after a week or two of using it, my thoughts on it are that the keyboard is great for a laptop keyboard, i can achieve a fairly good typing speed and accuracy on it and when i make mistakes it actually feels like the mistake was made because of human error as opposed to the keyboard being bad, the trackpad is quite honestly the nicest one i’ve ever used and macOS for the most part is a very nice looking and working operating system, especially for use on a laptop. i don’t appreciate the amount of password entries that pop up to do things like change settings or open already installed software that hasn’t been verified by Apple, nor do i appreciate the idea that basic features Windows and Linux have had for years are paywalled on Mac through third party software (please excuse the slight rant but the idea that an entire subscription service that just lets you download paid quality of life software or basic productivity apps to your machine because getting all the ones you want is too expensive actually exists is mad to me but it is 2025 so…) but apart from that I do like the OS. and either way that last point is starting to become a bit less of an issue now as Apple makes efforts to build these features into the OS natively and a lot of alternative utilities are appearing that are free and open source (Rectangle, DockDoor and Stats are great pieces of software for example).

(note: this post has had its publish date edited to reflect the date and an approximate time it should have gone up on. i was not able to publish it at that time because of a technical error. no other edits have been made to the post since that date apart from this note to reflect that.)

i invested in the gear vr lens mod

so if you didn’t know, i’m pretty big into vr. quite the enthusiast i’d say. i unfortunately don’t have like a big collection of vr shit for now but i am trying to save up and what i do have has really given me quite a positive experience with the technology. to give some context because i don’t talk about vr nearly enough here, i started off with the original vive in late 2021 as the main thing i was looking for in a headset was a cheap entry point into the steamvr ecosystem. i really enjoyed using it and believe that if you have no experience in vr it’s a really solid way to start if your main priority is the same as mine, especially now that you can find them for ridiculously cheap prices (in the UK often just over £150 for a full kit). when i decided that it was time for a new headset, i found a used vive pro for around £190 and a wireless adapter kit for around £150. my experience with that was equally as amazing. the same deep blacks and generally more vibrant colours i had come to expect when in vr, screen door effect noticeably reduced, and a headstrap that is so much better than anything htc made for the original.

a big downside of the vive though was of course the controllers. not for the reason you’d expect though surprisingly. at this point i had never experienced any controllers other than the wands, apart from using a friend’s quest 2 for a short amount of time. i really enjoyed using the touchpads (to the point that even today with the index controllers i make great use of theirs), and the click on the triggers felt great to me too. the problem i had with them funnily enough, was build quality. for as much as i loved the wands’ touchpads, they were built like shit and i had to buy 4 replacements over the time i was using them because of how often they would fail. this left me with a lot of wands sitting around doing nothing so i ended up following a guide online to convert 2 of them into trackers and stuck them onto an old pair of shoes. i was originally planning to buy a vive 3.0 tracker in order to get tracking of my hip/waist for proper full body tracking but due to the fact that i had bought a link box and tether for my vive pro i no longer had any way to power the original vive to use it for its built in watchman dongles so instead i bought the gear vr lens mod (and looking back at it i’m happy i did because not long after that purchase the 3.0 vive tracker went on sale lol). it was about £40 for the lens mod itself and a handheld manual air blower to blow out any dust that entered the headset when i took the lenses off.

fast forward a few days, everything arrived and i popped off the vive pro’s original lenses by pushing a small flat-head screwdriver in between the lens and the casing and then prying up. they got stored separately in plastic bags then i dusted the screens inside the headset and pushed in the new lenses. when i started up the headset and opened vrchat i was fairly amazed by how much cleaner things seemed now. the sweet spot felt much bigger, glare/god rays were noticeably reduced, the rings you could see through the old lenses due to the way they’re made were no longer visible, and things were generally a lot less blurry. the screen door effect i do believe is a little more noticeable but i don’t really mind it, weirdly enough i’ve been known to quite like the look of the vive pro’s screen door effect in some cases. after testing i then put the headset away for a bit and went to do other things.

later i put it back on and upon entering my vrchat home world i immediately noticed something was off. the world’s skybox distorted a lot when i moved my head and the main menu looked like it was bulging forward. in an attempt to fix this i shut down the headset and used the lighthouse console accessible in SteamVR’s program files to write the v14 config found here to the headset. after doing that the skybox distortion became a lot less noticeable. it was definitely still there but not at all in an amount that annoyed me personally. now, the menu’s distortion. after a bit of searching i found out that adjusting my headset’s ipd should fix it, which it indeed did. a few weeks in i noticed what i thought was a set of stuck pixels in the bottom left of my vision in one eye. i paid no attention to it for that day while simultaneously worrying that the green screen that shows up in vr when your computer’s locked might have caused some pixels in my headset to go stuck. later on i thought that maybe it might have been some dust stuck in the headset so the next day i took that lens off and dusted the screen again. that fixed it.

now that it’s been a month since i first installed the mod, i can say i quite like it. its not perfect at all, the lenses that were chosen for the original vive (and presumably by extension the vive pro because they seem to use the same ones) were chosen for a reason and by installing this mod you will be introducing distortion to the optics of your headset, distortion that in the worst case could end in you becoming very motion sick without even realising it (to quote the comment i linked a little bit up above, “Most concerning is that swimmy HMDs cause nausea at an almost subconscious level, you don’t need to perceive it for it to make your experience using the HMD unpleasant.”). in my experience though i’ve felt none of that, even after the fixes i still notice distortion but for me personally it’s not at all an issue. people claim as well that by installing this mod you will lose a small amount of fov, i never noticed this either myself which could be to do with the fact that i use the original vive’s facial interface on the headset which does push my eyes closer to the lenses. my apologies if you just so happened to find this post while deciding whether or not to install the mod but your mileage will absolutely vary when installing it and i feel that’s a really important thing to let you know. for a bit more of a definitive answer on whether or not you should do it though, do consider it if you’ve been using vr for a good while, know that you have a good tolerance to anything that causes motion sickness in vr and don’t at all mind taking a risk.